Filed under: asides, challenge, garden | Tags: Arizona, change, chicken, family, farmers markets, food, garden, grad school, graduation, home, jam, local, love, marmalade, Phoenix, season, sweet potato, tradition, transition
 A year-and-a-half ago I started this blog. It was to be an experiment: could a grad student make one meal a week from all local ingredients? The answer, it turns out is yes. (As long as you take the term “meal” lightly.)
Now, I’m 11 days from graduation and I’ll no longer be a poor grad student. I’ll be a poor, recently-graduated student. There’s a difference, I’m sure.
It’s funny to look back at that first post. That moment when I vowed that I wouldn’t be growing anything, instead relying almost entirely on farmers markets around the city.
 I’m not sure when it happened, but somewhere along the way I became a jam making, pickle canning, garden obsessing cook. It became less about cobbling together every possible ingredient – no matter the challenge – from a farmers market and more about making stand-out, stand-alone dishes from food I adored.
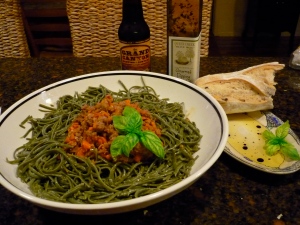
It became about marmalade and giant sweet potatoes, stuffed pumpkins, simple spaghetti and a chicken that stole my heart.
It was a beautiful and freeing change.
 I’ve watched six seasons come and go while in grad school. In a small way, I’ve celebrated them all. I’ve eaten local both here in the Valley of the Sun and abroad.
Looking back, I wouldn’t change a thing.
But this isn’t all about the past. There are big changes on the horizon – even if I don’t quite know what they are, yet. But I do know one thing, the end of my masters career doesn’t mean the end of this blog.
I like local food too much to let this go.
Filed under: challenge, dinner, holiday, local, phoenix | Tags: apple, Arizona, carrots, challenge, cheese, chicken, dates, farmer cheese, farmers markets, local, Phoenix, potato, recipe, sausage, stuffing, sweet potato, thanksgiving
A quick little note: I don’t believe in the “I’ve been super busy” excuse because everyone is busy … but things have been crazy around here lately. So, in an effort to get this post out (finally) there are no recipes with it. Don’t worry, they’re coming, just not right now. Once finals are done, I promise.
 Yes, Thanksgiving was two weeks ago. Yes, ideally, I should have posted this before Thanksgiving. All that being said, however, this Thanksgiving was amazing. It was the first time I’ve really jumped in and cooked – and it was a blast. We had a pretty non-traditional meal, but, then again, we wouldn’t do it any other way.
In trying to adapt this traditional meal to one made with all local products, I was surprised by how few sacrifices needed to be made. In fact, the only things cut from our traditional meal were the cranberry sauce (which doesn’t go with chicken anyway) and cherry pie (which we still had – it just wouldn’t be a holiday without a cherry pie).
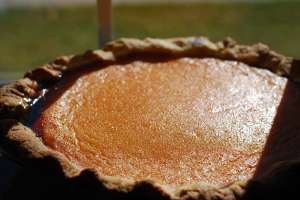
We also didn’t have pumpkin pie -which we could have made from scratch – opting for sweet potato instead. For those of you out there who absolutely love pumpkin, let me tell you, the sweet potato version was actually – gasp – better. Now, before I get any hate mail, let me do some explaining. This pie was both sweet and savory and had a wonderfully rich sweet potato flavor. Unlike pumpkin pie where one flavor is dominant, this recipe had a lot of depth and each bite was its own, unique flavor. By the next day the flavors were so complex that each bite required a little bit of time to explore. It will most likely become our Thanksgiving staple from now on.
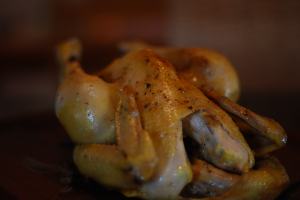 This year, we cooked a chicken – which is something we’ve been doing for several years now – and it was our first sample of local, pasture raised chicken. I’m not sure if there’s a better way to describe it, but it tasted like, well, chicken. The meat had an actual flavor, which isn’t something you always get with the bland, dry grocery story variety. We had our perennial favorites – stuffing and salad. And instead of sweet potato casserole this year (made without marshmellows, thank you very much) we had scalloped potatoes.
Shopping for all these ingredients wasn’t nearly as challenging as I’d expected. I’d started the week before with the local chicken, bread (the nine-grain bread from the stuffed pumpkin was so delicious that I had to repeat it), potatoes, onion and cheese. The day before the big dinner, I stopped by the Wednesday market in Phoenix to pick up everything else I needed.
 While purchasing the sweet potatoes from Horny Toad Farms I was very eagerly talked into some local medjool dates. The little guy selling them was really worried I’d balk at the price and did everything possible to prepare me for the “big cost.” By the time he was ready to tell me the price, I was concerned that I’d fallen in love with $25 dates. Turns out it was $7.50 for a carton – which, in my book, is a steal. In the end, I was so happy I bought them because they were perfect stuffed with Udder Delights cranberry farmers cheese and topped with pomegranate seeds.
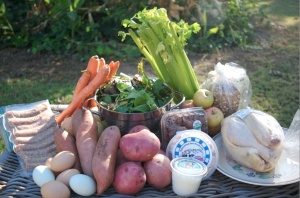 I picked up the rest of my required produce and headed over to the Tempe Farmers market to get butter, some more cheese (because you can never have enough) and breakfast sausage for the stuffing. All told, it took three trips to get everything – which really – isn’t any more than normal.
With the paired down menu and lack of a turkey, the cooking requirement was manageable. My Mom cooked the pies in the morning, Dad started the chicken around 1:30 in the afternoon and with an hour of cooking time left I started assembling the stuffing – made with breakfast sausage from the Meat Shop – and scalloped potatoes. Yes, we all helped, but this was a Thanksgiving dinner that one person could have reasonably cooked in one day.
The best part of the day was experiencing some the traditional flavors in season, fresh and locally grown. We had bread made by neighbors (they go around the neighborhood once a week selling fresh, homemade bread), eggs raised by friends and a bird that lived a normal life before being sacrificed for a special meal.
I’m not one to get overly sentimental … oh, who am I kidding, I cry at cheesy movies … but this meal was really special. While the food may have tasted better thanks to its freshness, knowing it came from people who care about our and the land’s health made the meal all the better. Sharing it with my wonderful parents and working together to get it on the table made it a truly wonderful holiday. I look forward to more local Thanksgivings for years to come.
Happy Holidays and Bon Appetit!
Quick Note: Here’s the photos that will go with the recipes, you know, so you come back and read them …
Sweet Potato Pie
From America’s Test Kitchen
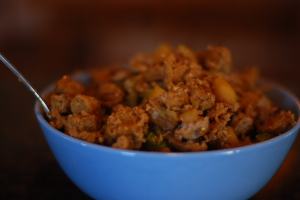
Apple Sausage Stuffing
From America’s Test Kitchen
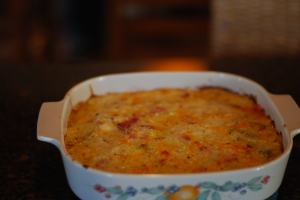
Scalloped Potatoes
Roast Chicken
From America’s Test Kitchen
Stuffed Dates
Boiled Carrots
Filed under: farmers markets, local, phoenix | Tags: Arizona, arizona republic, farmers markets, heritage, local, Phoenix, thanksgiving, turkey
Thanksgiving is tomorrow and, if you haven’t heard it before, it’s the ideal locavore meal. The original meal was created with local, seasonal food. It’s one of the few meals that’s made with genuinely American ingredients. Squash, fish, wild turkey (which may or may not have been at the first dinner – it is commonly thought that venison was there, however), corn, pumpkin and maybe cranberries all combined to make a meal in celebration of a successful harvest. It’s easy to recreate the traditional – er, the new traditional – meal anywhere in the country thanks to grocery stores featuring foods driven in from the other end of the country and factory turkeys. It is just as easy to create all local variety with foods growing in your area. And if there is any meal where going local and celebrating the harvest is encouraged, it’s Thanksgiving. This is the time of year to genuinely celebrate the harvest – whatever it consisted of – and make a meal that honors the hard work and love that went into the foods cultivated during the year. If you didn’t raise any food, which I didn’t, it’s a great time to head to the farmers markets and honor them with patronage. But enough with the waxing poetic over local ingredients. Let’s get on to the bone picking.
.
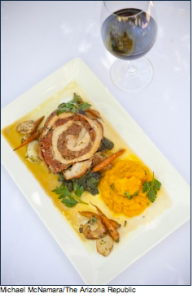
Last week, November 17th 2010, the Arizona Republic ran with this sentiment and published “Arizona locavore Thanksgiving feast.” Greg LaPrad, chef at Quiessence at the Farm at South Mountain in Phoenix crafted a gorgeous meal including a pork loin and goat cheese cheesecake. I was genuinely excited to see the newspaper focusing on such a great cause, however, I was immediately disheartened when I read this sentence:
In a break from tradition, LaPrad stuffs a pork loin instead of a turkey because no birds are available locally.
I was bothered for two reasons. 1. There are turkeys available locally and 2. since I am a current journalism student, the author of the article should have taken the time to research this fact, instead of just taking the chef’s word for it.
If she had done a google search, she would’ve found this:
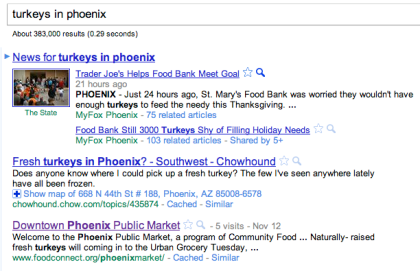 See that purple link there? That’s one I visited 5 times over the past week, doing research on Thanksgiving options available in Phoenix. It took you to the Downtown Phoenix Public Market site where the fresh and frozen local turkeys available were listed. According to One Windmill Farm, they had 25 turkeys available and “returned to the farm” to “get some more birds” in order to meet the demand for local, heritage gobblers. Now, 25+ birds will not feed a city of over 6 million, but they weren’t the only ones with the traditional main course.
Now, I admit, it’s a bit much to get worked up over 25+ local birds. However, as the local movement continues to grow, it’s important that people know the resources available, even if there are only a handful of traditional birds. This is not to say that I wasn’t thrilled that the article presented an alternative to turkey, especially given the limited quantity. However, it’s important to highlight the birds that were available locally which could, with purchasing dollars in action, be more prominent next year. Furthermore, supporting heritage turkey – through consumer power – means these birds may once again become a part of farm life. Instead of the genetically modified, large-breasted birds that are physically unable to mate due to their food-driven physique, heritage birds are able to reproduce (without assistance), come from a rich ancestry and have a well-rounded flavor that trumps the generic, even bland, industrial Tom.
Ok, and I’m off my soapbox.
This Thanksgiving, I’m going all local. We’re having roasted chicken (with only three diners, it just doesn’t make sense to cook three times the amount of food necessary), boiled carrots, apple-sausage stuffing, scalloped potatoes, salad with farmers cheese and either sweet potato or apple pie for dessert.
Whatever you make this holiday, I hope it is a wonderful day of thanks filled with family, friends and great food.
Bon Appetit!
Filed under: challenge, dinner, farmers markets, local, phoenix, recipe | Tags: apple, apples, Arizona, cake, challenge, cheese, farmers markets, local, Phoenix, pumpkin, recipe, rooster, stuffing, swiss chard, thanksgiving, whipped cream
 With Thanksgiving right around the corner – or tomorrow, to be exact – I decided to cook some trial recipes and see how they turned out. I’m a big fan of cooking new recipes (and do so almost every week) but there’s nothing worse than making a brand new recipe on Thanksgiving day only to have it turn out rotten. I stumbled across an amazing recipe from Dorie Greenspan for stuffed pumpkin while searching Amazon for new cookbooks a few weeks ago and feverishly searched the market for pumpkins the following week. Much to my dismay, I came up empty-handed both weeks and, figuring that I had missed the last of the pumpkins for the season, resigned myself to waiting until next year.
You can imagine my joy when I saw a cluster of bright orange beauties at one of my favorite stands, Horny Toad Farm, just waiting to be turned into dinner. I picked up the roundest one I could find, at a hefty 6 pounds, and merrily changed my plans for the week from swiss chard enchiladas to stuffed pumpkin. In retrospect, I should have purchased two of them – seeing as pumpkin always comes in handy at Thanksgiving – but my arms were already overloaded with two whole chickens, a large bag of apples and various other produce. Fortunately, there’s a market on today, although I’m not sure if there’ll be any orange balls of joy waiting for me.
 Following my pumpkin acquisition, I quickly picked up the remainder of ingredients required for dinner, somehow got talked into buying 1 pound of jalapenoes for $2 (I have, literally, no idea what to do with them – they might get pickled), and headed off to pick up some wine for dinner and Thanksgiving. On the way, I stopped at the Tempe Farmers Market – they have a better cheese selection – I stumbled across their free expired bread and picked up a loaf for Wily. By the time I made it home from my epic shopping trip – three and half hours later – I had ten different bags of goodies. I’m still not entirely sure how I ended up with all that stuff, however I’m pretty prepared for Thanksgiving (kinda).
It turns out that stuffed pumpkin is a phenomenally easy dish to make. I’m very disappointed that it won’t be gracing my Thanksgiving table, however with only one oven a chicken or two to cook there’s no way I can fit a pumpkin in as well. However, it’s a fantastic substitute for a whole bird and could easily be adapted for a gorgeous vegetarian main course. If takes about fifteen minutes to cobble the stuffing ingredients together and, depending on your pumpkin cleaning skills, about 10 minutes to get the inside clean. After that it’s smooth sailing – it simply sits in the oven for two hours – no further cooking required.
The ease of the pumpkin meant that I had time to put another Dorie Greenspan recipe together – apple cake. As someone who doesn’t like overly sweet dessert, I seek out French style desserts which highlight the fruit and not the sugar. The only challenge here is the fact that the required rum and sugar cannot be sourced locally, however, I’m not willing to completely sacrifice the delicate flavor of this cake for, oh, one cup of ingredients. I’m delighted to report that this apple cake is simple to put together and, with a dollop of whipped cream (not from a container) it’s a wonderfully light dessert. And one that I will happily make again and again.
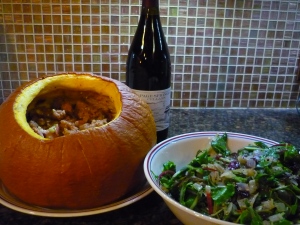 Finally, while the cake was sharing the oven with the pumpkin, I started in on the swiss chard dish. The recipe comes from my newest cookbook acquisition, Simply in Season, and – with the exception of cranberries – is easily assembled from the ingredients I picked up at the market in the morning. I’m not the biggest fan of swiss chard, however, it’s in season right now which means it’s time for me to learn to love it. Initially, I was hesitant about the recipe, but after a few bites I was sold. The cranberries (which are not from Arizona, but were organic) and sugar highlight the complexity of the chard and make it my current – and only – favorite chard dish.
.
Stuffed Pumpkin
Adapted from Dorie Greenspan’s Around my French Table
Serves 6 (this will vary based on pumpkin size, the following is for a 6 pound pumpkin)
Ingredients:
1/2 pound nine grain bread, sliced thinly and cut into 1/2 inch pieces
1/4 pound cheddar cheese, cut into 1/2 inch cubes
1/4 pound Monterey Jack cheese, cut into 1/2 inch cubes
2 cloves garlic, coarsely chopped
6 small slices ham, cooked and chopped into 1/4 inch pieces
2 Tbsp fresh chives, chopped
2 Tbsp mild onions or scallions, chopped
1 Tbsp thyme
2/3 cup heavy cream
pinch of freshly ground nutmeg
salt and pepper to taste
Preheat oven to 350 degrees. Line a baking sheet with parchment paper or you can use a dutch oven or casserole dish. The pumpkin will retain its shape regardless of what you cook in it, however if you plan to serve it in slices it’s best to use the baking sheet.
Cut a cap out of the top of the pumpkin and clean out the guts. Generously pepper the inside of the pumpkin and set in on the baking sheet or dish.
Toss the bread, cheese, ham, garlic and herbs together in a large bowl. Add the nutmeg and some salt and pepper to the cream (go easy on the salt, however, as the cheese and ham are quite salty). Pour the cream mixture over the combined ingredients and toss well. You want the bread to be moist, but not swimming in cream.
Using your hands – or a spoon – stuff the ingredients into the pumpkin. You may have too much or too little – every pumpkin is different – adjust as necessary. Place the cap on back on the pumpkin and bake for 2 hours. Check the pumpkin after 1 1/1 hours. For the last twenty minutes of cooking time remove the cap so the ingredients can brown and any residual liquid bakes off. The pumpkin is done when the ingredients are bubbling and the flesh of the pumpkin can be easily pierced with a knife.
You can serve this in slices or, if you prefer, scrape the pumpkin meat away from the sides and mix in with the stuffing.
Sweet and Sour Swiss Chard
Adapted from Simply in Season
Serves 4
Ingredients:
1 pound swiss chard
1 medium onion, diced
1/4 cup dried cranberries, raisins or currants
2 cloves garlic, minced
2 tsp olive oil
3 Tbsp vinegar
1 1/2 tsp sugar
salt and pepper to taste
Stack the chard leaves, roll them up and slice into 1 inch strips.
In a large skillet heat up the olive oil and saute onions until softened, about 5 minutes. Add in 1/4 of the chard leaves along with the garlic, vinegar, sugar, cranberries and salt and pepper. Cover and simmer for 5 – 8 minutes. Place the remainder of the chopped leaves on top – do not stir in – cover and cook for 2 – 3 more minutes. Stir the mixture around and let cook for another minute.
Apple Cake
Adapted from Dorie Greenspan’s Around my French Table
Serves 4
Ingredients:
¾ tsp baking powder
Pinch of salt
6 small to medium apples
2 large eggs
¾ cup sugar
3 Tbsp dark rum
½ tsp bourbon vanilla extract
8 Tbsp (1 stick) unsalted butter, melted and cooled
Preheat oven to 350 degrees. Generously butter an 8 inch cake pan – preferably a spring form or false bottom pan.
Peel the apples and slice into 1 – 2 inch pieces.
Whisk the flour, baking powder and salt together in a small bowl.
In a medium bowl, beat the eggs with a whisk until foamy. Add in the sugar and blend thoroughly. Add in the rum and vanilla extract. Whisk in half the flour mixture and once smooth add in half the butter and whisk until smooth. Add in the remaining flour mixture, whisk and the remaining butter whisking until the batter is smooth and thick. Using a rubber spatula, fold in the apple pieces until they are coated in batter. Scrap the mixture into the pan and level it as much as possible.
Bake for 50-60 minutes until the top is golden brown and a toothpick inserted into the center comes out clean. Transfer to a cooling rack and let rest for 5 minutes.
Gently run a butter knife around the edge of the cake, remove the sides of the cake pan and let cool until it is at room temperature. If you want to remove the cake from the cake bottom, use a a long spatula or long knife and work it gently until the cake is loosened from the pan. Place a large plate on top of the cake and gently flip the cake and pan bottom over, gently release the cake bottom from the cake. Using a second plate, flip the cake back over so the golden brown side is facing up. Serve with a dollop of whipped cream (the recipe follows, by popular request)
Almond flavored Whipped Cream
Makes enough for one cake
Ingredients:
1 cup heavy cream
1 1/2 Tbsp sugar
1 capful amaretto liquor
Combine all ingredients in a medium bowl. Beat with a hand mixer until soft, fluffy peaks form. Adjust the sugar to taste. If you don’t want to use the liquor, you can substitute a couple drops of almond extract.
Bon Appetit!
Filed under: challenge, dinner, farmers markets, local, phoenix, recipe | Tags: Arizona, challenge, cheese, chickens, eggs, farmers markets, France, gratin, julia child, local, olive oil, onion, Phoenix, pork shoulder, radish, recipe, rooster, salad, sparkling wine
 Last week, I crossed pomegranate tree off my garden wish list. This week, I made some significant progress on the chicken front. While I still don’t have actual chickens, I do have a rooster! Well, I should say that my parents have a rooster since he lives in their backyard and not my studio apartment. How we ended up with him is a long story but, suffice it to say, we decided to keep the young vagabond and let him roam free in the yard. Sadly, after much deliberation, we decided against getting hens to go with Wily (it’s a very descriptive name, let me tell you). So for now I have to be content with the little guy who – despite his best, and hilarious, efforts – is still too young to crow.
In honor of Wily, and thanks to my neighbor’s generous gift of a dozen eggs, this week I decided to celebrate chickens … by cooking eggs (and not chicken). After some debate about what type of egg dish to create, I ended up choosing gratin. I had initially hoped to create a leek and pork shoulder version – with the leeks individually wrapped in a slice of pork shoulder – however the leeks I found at the market this week left something to be desired. The potato version is just as good and is a great dish to make at the end of winter when you only have small quantities of staples left on hand. Not that this is the end of winter – or even winter – mind you.
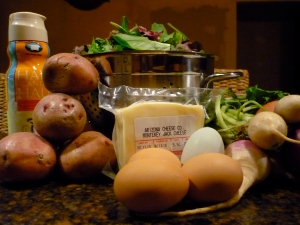 I made two trips to the market this week. The first trip was punctuated by attempting to interview farmers for a homework assignment (let’s just say it didn’t go well) and then rushing off without any purchases in hand. I once again tried to make it to the open air market at the Tempe market but just missed it. The good news, however, was that, except for leeks, the store had all the ingredients I needed.
Gratin is an amazingly easy dish to create, surprisingly adaptable and just as easy as making scrambled eggs. This is a perfect lunch or dinner dish and especially wonderful as the weather turns colder. This version, made straight out of Julia Child’s Mastering the Art of French Cooking, turned out more eggy than those I remember eating in France – but just as good. Served with a slightly bitter salad (but not too bitter, hence the caramelized radishes) and sparkling wine from New Mexico, it absolutely sings. My only caution is to make lots of it – three hungry people easily devoured a serving for four.
Gratin of Shredded Potatoes with Ham, Cheese and Onion
Adapted from Julia Child’s Mastering the Art of French Cooking
Serves 4
1/2 onion, minced
2 Tbsp olive oil
4 Tbsp butter
3 slices pork shoulder or ham
4 eggs
1/2 clove crushed garlic
2 Tbsp chives, minced
2/3 cup Monterey Jack cheese, grated
4 Tbsp half and half
1/4 tsp salt
Pepper
3 medium sized potatoes
1/2 Tbsp butter in pea sized pieces
Preheat oven to 375 degrees. In a large skillet, combine 2 Tbsp butter with the olive oil over medium heat. Once hot, cook the onions slowly until softened but not browned. Raise the heat slightly, stir in the pork shoulder, and cook until heated through. Set aside.
Beat the eggs, garlic, herbs, cheese, half and half and seasoning in a large mixing bowl. Add in the ham and onions.
Peel the potatoes and grate them using the large holes of the grater. Take 1/3 of the potatoes at a time and, using paper towels, squeeze out the water. Add the potatoes to the egg mixture. Adjust seasoning as necessary.
In the same skillet from earlier, melt 2 Tbsp butter until foaming. If your skillet isn’t oven proof, use an 11 – 12 inch baking dish or medium sized casserole dish and pour in the foaming butter. Pour the egg mixture into the dish. Dot with the pea-sized butter pieces and bake for 30 to 40 minutes until top is nicely browned.
While the gratin bakes, prepare the salad.
Caramelized Radish Salad
Serves 4
Ingredients:
1 head lettuce, preferable arugula or other bitter salad mix
3 medium radishes
1 tbsp butter
pinch sugar
1 portion Basic Vinaigrette Dressing (found on recipe page)
Slice the radishes into match sticks. In a small skillet, melt the butter over medium heat and once hot, add the radishes. Give them a good stir after about a minute and add in a pinch of sugar. Let set for another minute, and stir again. Keep them on the heat until they begin to blister with brown spots. When done, remove and add to the salad. Toss with dressing right before serving.
Bon Appetit!
Filed under: challenge, farmers markets, local, lunch, phoenix, recipe | Tags: Arizona, bell pepper, challenge, cheese, chicken, childhood, couscous, farmers markets, garlic, local, olive oil, organic, Phoenix, pomegranate, recipe, rice, soul, stuffed peppers, tomato
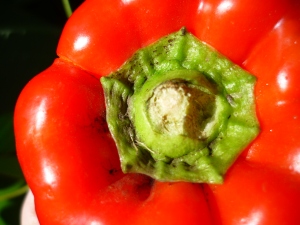 I have a confession to make: I didn’t choose my local meal this week. Not wanting to repeat my crazed market trips and suffering from a lack of inspiration, I invited a dear friend of mine from Canada to share in the local process. After sorting through four different cookbooks, and debating the merits of each, she decided that stuffed bell peppers sounded like the best dish. And truthfully, I couldn’t have agreed more. Little did she know, stuffed bell peppers are one of my favorite meals and something that made a regular appearance on my family’s dinner table throughout my childhood. For me, stuffed peppers are a very comforting dish. There’s just something special about that rich filling hidden inside the sweet bell pepper shell. I don’t quite know what it is, but like chicken soup, it’s good for the soul.
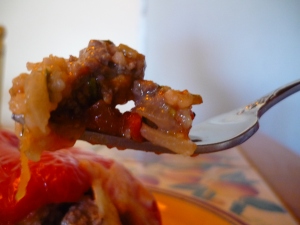 There were two sticking points to this dish, however, and that’s the necessity of ketchup and rice. The ketchup problem was easily solved by creating a sauce with the reserved tomato juice and thickening it with some corn starch. Rice, on the other hand, grows only in wet climates where water stays on the ground for a while. Seeing as Phoenix is not only a desert but also suffers from very dry soil, it’s highly unlikely that rice would do well in this climate. Beyond that challenge, most rice is grown overseas, except for wild rice (which is actually a grass) grown in midwest. Some rice is grown in California but, for whatever reason, I can’t seem to find it in stock here in Phoenix.
I briefly thought about creating a traditional French farci filling for the peppers – which replaces the rice with bread crumbs – but thought better of it when remembering that farci has a tendency to be overly dry, and typically is used in small amounts for a reason. I finally solved my rice conundrum by revisiting the organic brown rice couscous from the Chopped Salad recipe. I had quite a bit still sitting in my pantry but was worried about the texture and moisture content of the grain. Couscous is fairly tiny – and can be very dry – and had the potential to get lost in all that texture and flavor of the stuffing. Having no other choice, I jumped in feet first.
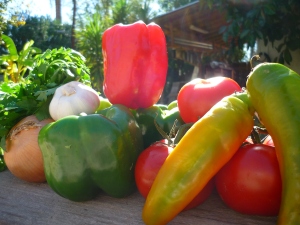 This week, I returned to the Phoenix Public Market and, as it has been for the last month, it was positively full of people. Despite the hustle and bustle, I find it inspiring to see the market full of people all wandering around with purchases in hand. This week the market was full of lettuces and carrots and even a few renegade eggplants! Turns out my ratatouille dish wasn’t going to disappear out from under me after all! Also at the market this week, was a stand selling potted vegetables, flowers and trees ready for planting in winter gardens. Besides the gorgeous flowers, there were several large and healthy tomato plants. They were quite a steal too at $5 a plant. However, I opted for the somewhat exotic pomegranate tree at the great price of $10.
I’ve been trying for about a year now, unsuccessfully, to talk my parents into expanding their fruit trees. While they already have several trees, including an orange, peach – and a, as of yet, unknown citrus volunteer – I’ve been pushing for some of the more bizarre fruits that grow well in Phoenix. Including avocado and pomegranate trees. This weekend my wish finally came true and I’m happy to say that the pomegranate tree has been planted and should thrive. Now, if only I could convince them on those chickens…
Fruit trees and chickens aside, the preparation and cooking of these stuffed bell peppers is fairly simple. It’s a two pot meal (well, and one baking dish) that takes about 30 minutes to put together and another 30 to bake. The most challenging part – truly – is cleaning out the insides of the bell pepper without puncturing any holes. My concerns over the couscous issues evaporated after cooking the grain with 1.5 times the required water for half the time. The couscous stayed nice and moist and helped blend the rest of the ingredients together. This is a great dish for dinner and will be revived at my dinner table for years to come.
Stuffed Bell Peppers
Adapted from America’s Test Kitchen
Serves 4
Ingredients:
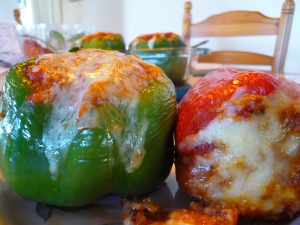 4 bell peppers of any color (red, yellow or orange are preferable), 1/2 inch trimmed off the top, stemmed and seeded
1/2 cup couscous or similar grain
3 tbsp olive oil
1 onion, chopped fine
1 pound ground beef
4 cloves garlic, minced
5 medium tomatoes, peeled, seeded and crushed (reserve about 1/2 cup of the juice that’s released during the seeding process)
5 ounces Monterey Jack cheese, shredded
2 tbsp fresh parsley, chopped
3 sprigs fresh thyme
1/4 thickened tomato juice
Fill a large pot with water and bring to a boil. First, immerse the tomatoes in the water for 10 seconds each and peel and seed them. Using the same water, add the bell peppers and cook until they begin to soften, about 3 minutes. Remove the peppers from the pot, draining the excess water. Place the peppers cut side up on a paper-towel-lined plate.
Discard all but 1 1/2 cups of the water. Return to a boil and add the couscous and a generous pinch of salt. Cook for 7 minutes, drain and transfer to a large bowl. Pre-heat the oven to 350 degrees.
While the couscous is cooking, heat 2 tbsp of the olive oil in a large skillet over medium-high heat. Add all but 1 tbsp of the onion and cook until softened, about 5 minutes. Stir in the beef, breaking it into small pieces, until no longer pink, about 5 – 6 minutes. Stir all but 1/2 tbsp of the garlic and cook until fragrant, about 30 seconds. Transfer the mixture to the bowl with the couscous.
While the onion and beef mixture is cooking, heat 1 tbsp olive oil in small a sauce pan over medium heat. Add in the remaining onions and cook until they begin to soften, about 3 minutes. Add in 1/2 cup of the reserved tomato juice and 1/2 tbsp garlic and bring to a boil. Once it has come to a boil, add in salt and pepper to taste and the leaves of 1 sprig of fresh thyme. After 1 minute, reduce to a simmer.
While the tomato sauce simmers, return to the stuffing. Add in the tomatoes, all but a handful of the cheese, parsley and 2 sprigs of thyme. Season the mixture with salt and pepper to taste. Stir to combine.
Place the peppers, cut-side up, in a 9 by 9 glass baking dish. Divide the filling evenly among the peppers.
Return to the simmer tomato sauce. If the sauce coats the back of a spoon it’s ready to go. If not, add in a small spoonful of corn starch. Whisk vigorously and let cook for an additional minute or two. The mixture should coat the back of a spoon. Once finished, spoon the sauce over the peppers and sprinkle with the remaining cheese.
Bake until the cheese is browned and filling heated through, about 30 minutes.
Bon appetit!
Filed under: challenge, dinner, farmers markets, local, phoenix, recipe | Tags: bolognese, challenge, farmers markets, linguine, local, olive oil, pasta, Phoenix, procrastination, recipe, Tempe
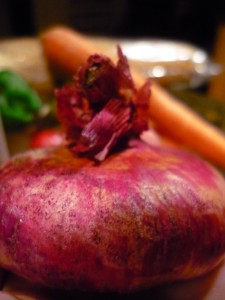 This past weekend I decided to experience a new venue for local food. I had planned on attending the Tempe Farmers Market open air market from 2 – 6 p.m. on Saturday but got something of a late start (if we’re being completely honest, I left the house 25 minutes before the open air part closed due to, what can only be described as, severe procrastination). However, my laziness paid off and I discovered that the store is open from 8 a.m. to 10 p.m. everyday and they stock a wide variety of local produce, meat, bread and even locally made pasta. It’s the perfect solution for all those times when you need local food and the markets aren’t open, like at 6 p.m. on a weekend … or most times during the week.
Now, to be fair, the Phoenix Public Market also is open during the week, however, they seem to rely more on organic produce from California than local fruits and vegetables. And while the Tempe market has more local produce, it doesn’t have the fantastic sandwicherie aspect that I love so much about the Phoenix market. The thing is, both stores are fantastic and the fact that the Phoenix metropolitan area has two stores featuring local produce speaks to the uniqueness of this desert. Besides, it’s wonderful to have multiple options for finding local produce especially when you find yourself cooking dinner later than usual on a Saturday.
Like my first local shopping experience, my trip this week involved no recipe plan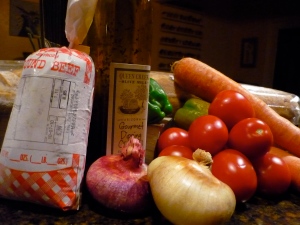 and resulted in about a dozen ideas for dinner. I toyed with making steak and potatoes before changing everything to create breakfast for dinner with chorizo and egg burritos. There was even a brief period when I entertained the idea of cooking a pot roast, however, that got abandoned after realizing dinner wouldn’t be done until midnight or so. Finally, I ended up with pasta Bolognese. The meal was the perfect way to use the giant, organic carrots that I continued to carry around in my basket despite my ever-changing recipe plan.
Mostly, however, it was also a chance to cook the locally made DeCio pasta that I see every week at the market. During my typical shopping spree at the Phoenix Farmers Market I usually pass the DeCio stall about, oh, five times. Amazingly, I’ve never stopped to find out more about the pasta. Well, my bizarre pasta drought ended this week as I decided to honor my Italian heritage and break boldly into the world of local linguine with sauce.
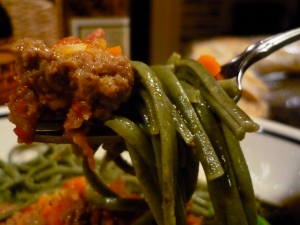
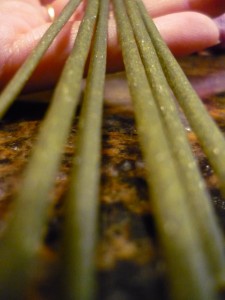 As I stared down the impressive store display, I was overwhelmed by the wide variety of flavor combinations. There was saffron, onion beet, Szechuan orange spice and chili cilantro among others. Confused and curious about the potential unusual flavor combinations, I finally ended up with the somewhat mundane Herb D’Italia linguine. I’m happy to report that my hesitation resulted in a solid flavor combination. Though the pasta was a little more brittle than what you typically find, the taste and texture were excellent and the italian herbs in the pasta gave my rich sauce some much-needed lightness.
Paired with the Bolognese sauce, the pasta was not only savory but also extremely hearty. Twelve ounces of linguine with 1 batch of sauce easily feeds four with leftovers. With only a handful of tomatoes in the sauce – 1.25 pounds before peeling and seeding – the focus of the dish is on the meat. This is where local meat really gets a chance to shine. Because the additional seasonings are limited in this recipe, the strength of this dish relies on the flavor of the meat. The ground beef from the Meat Shop was tender and rich and had a complex flavor profile making it more beefy (and yes, that’s a technical term) than the run-of-the-mill supermarket option.
This is a low maintenance dish although, do be warned, it requires about two hours of simmering time. This is a great weekend recipe – once everything is simmering together you can walk away and do other things – however the slow cooking time means it wouldn’t be wise to start this recipe after a day at work. Unless, of course, you’re like me and enjoy eating dinner at 9:30 p.m.
Bolognese Sauce
Adapted from America’s Test Kitchen
Serves 4
1 tbsp butter
1/2 small onion, minced
1 large carrot, peeled and minced
1 small rib celery, minced
1 small bell pepper, minced
salt and pepper
1 pound ground beef
1 clove garlic, minced
1 1/2 cups milk
1 1/4 cups dry white wine
1 1/2 pounds whole tomatoes, peeled, seeded and crushed (keep some juice)
Parmesan cheese rinds (optional)
Melt the butter in a large sauce pan over medium heat. Add in the onion, carrot, celery, bell pepper and a generous pinch salt. Cook until vegetables are softened, about 6 minutes.
Stir in the ground beef and, using a wooden spoon to break the meat up, cook until no longer pink, about 4 minutes. Add in the garlic. Add the milk and simmer until the milk evaporates leaving behind clear fat (it’s important to wait until the fat turns clear, otherwise the sauce will be very greasy), about 15 – 20 minutes.
Stir in the wine and simmer until the liquid is almost evaporated, about 15 – 20 minutes.
Add the tomatoes and their juice and the parmesan rinds if using. Reduce the heat to low and simmer gently (there should only be an occasional bubble at the surface) until the sauce is very thick, about 1 hour. Season with salt and pepper to taste.
When tossing with the pasta, add a little olive oil and any pasta cooking water if needed to loosen the consistency of the sauce.
Filed under: breakfast, challenge, farmers markets, local, phoenix, recipe | Tags: alice in wonderland, Arizona, bacon, challenge, cheese, eggs, farmers markets, hash browns, impossible, Iron Chef, locavore, Ming Tsai, Phoenix, potato, recipe, strata
 This past winter, I read Lewis Carroll’s Alice in Wonderland and Through the Looking Glass for the first time. Though I am an avid reader, I somehow managed to ignore the small paperback that’s been sitting on my bookshelf for years. As I look back on this week’s challenge, I realize that I, too, have “believed as many as six impossible things before breakfast.” Notably, that I can cook breakfast for seven – including two small children – with all local ingredients and get everything on the table by 8:45am without any major catastrophes (the final batch of oily, uncooked hash browns that found a home in the trashcan do not count as major in my book).
The truth is, breakfast is a challenging meal. And as Chef Ming Tsai said on Iron Chef a few weeks ago, “Breakfast is really its own genre. Only certain people are good at cooking great breakfast.” Despite my best efforts, I am not one of those people who can get up bright and early and get those smiley face pancakes on the table. And as my black and blue thumbnail can attest, I can hardly even feed myself yogurt in the morning without something going wrong.
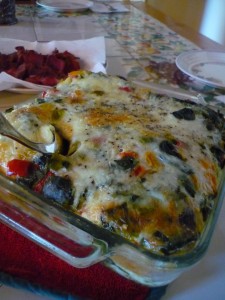
However, this breakfast strata recipe is a saving grace for night owls like me – it’s assembled the night before and only needs reheating in the morning. Combined with some cured, smoked pork shoulder and hash browns, it makes a perfect breakfast.
Though there were a few hiccups in the cooking, this dish represented a turning point for me in my locavore challenge: it was my first, true, multi-dish meal. Before this week, with the exception of a side salad, I’ve relied on stand alone items that don’t need side dishes. However, one breakfast strata cannot feed seven mouths alone – it needed those potato and pork back-ups.
My Saturday morning market trip reflected my broader shopping needs and came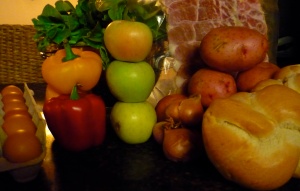 with its own side dish: a ray of sunshine. I decided to spread my shopping list around to different vendors this week, and my efforts were rewarded wonderfully. I found young, green-leafed spinach at one stall and pesticide free apples at another. I was even entertained by the very responsible young man, of about 12-years-old, who was manning the stall in his father’s absence. Apparently, he’s a loyal vendor at the market each week – “rain or shine” – unless there happens to be a natural catastrophe, like “an accident on the I-10.” Interacting with the vendors, of all ages, is one of the major benefits to these local meals.
Breakfast Strata with Spinach and Local Cheese
Adapted from America’s Test Kitchen
Serves 4 – 6
1/2 loaf French or Italian bread, sliced 1/2 inch thick
4 tbsp butter
4 shallots, minced
2 bunches spinach
1 red bell pepper, diced
1 roasted green chile, diced (optional)
1/2 cup white wine
1 1/2 cups meltable cheese, grated (I used Monterey jack, but any meltable cheese will work)
6 large eggs
1 3/4 cups half-and-half
Spread the bread slices on a baking sheet and bake for 20 minutes in a 225 degree oven until dry (you can also use bread that’s been out overnight). Using 2 tablespoons of butter, thinly coat one side of the slices.
While the bread bakes, melt 2 tablespoons of butter in a large skillet over medium heat. Add the shallots and cook until softened. Add the washed spinach leaves, bell pepper and green chile (if using). Cook until the spinach is wilted, season to taste. Transfer the mixture to a bowl. Add the wine to the skillet and simmer over medium-high heat until reduced to 1/4 cup – about 3 minutes.
Grease a 8-inch-square baking dish with butter. Arrange half the bread, buttered side up, in a single layer over the bottom of the dish. Spread half the vegetable mixture over the bread and sprinkle 1/2 cup of the cheese on top. Repeat to form a second layer with the remaining bread and spinach.
Whisk together the eggs, reduced wine, half-and-half, 1 tsp salt and a generous pinch of pepper. Carefully pour the mixture over the top of the assembled layers. Be patient with this process – allow the mixture to soak into the bread as you pour.
Cover the dish with plastic wrap and weight with 2 pounds sugar that you’ve transferred to a plastic bag. refrigerate at least 1 hour, preferrable overnight.
Preheat the oven to 325. Let the strata stand at room temperature for at least 20 minutes. Remove the weights, uncover and sprinkle with the remaining cheese. Bake until both the edges and center are puffed and the edges have pulled away slightly from the sides of the dish, 50 – 55 minutes.
Hash browns
From America’s Test Kitchen
Serves 4
Ingredients:
1 pound potatoes, peeled and grated
2 tbsp onion, grated
1 tbsp minced, fresh parsley (optional)
1/4 tsp salt
1/8 tsp pepper
1 tbsp butter
Melt 1/2 tablespoon butter in a large, non-stick skillet over medium high heat until it begins to brown, swirling to coat the pan. Scatter the potatoes evenly into the skillet and press firmly into a cake. Reduce the heat to medium and continue to cook until dark golden brown and crisp on the first side, about 8 minutes.
Slide the hash brown cake onto a large plate, then invert it onto a second plate so the browned side is facing up. Add the remaining butter to the pan and melt, swirling to coat the pan. Slide the hash brown cake back into the pan, browned side up, and continue to cook over medium heat until the second side is golden and crisp, about 5 minutes.
If you plan to make more than one hash brown cake, be sure the pan has no residue left in it from the first batch – if it does, the cake won’t stick together and you’ll lose the crispy brown layer to the pan.
Breakfast-style Pork Shoulder
Serves 7
Ingredients:
1 package pork shoulder (or any other bacon like substitute)
1/2 tbsp butter
Melt the butter in a medium skillet over medium heat. Once hot, add a few pieces of pork shoulder, leaving plenty of space around each piece. As the pork begins to sizzle and crisp, flip the pieces. Cook until crispy and remove to a paper towel lined plate. It’s important to get the pork nice and crispy, otherwise it tastes too much like ham. Serve while warm.
Bon appetit!
Filed under: challenge, dinner, farmers markets, local, phoenix, recipe | Tags: challenge, chickens, farmers markets, local, organic, Phoenix, recipe, salad
And away we go …
My first foray into local eating started, well, a bit chaotically. With only 30 minutes to shop at the Saturday Open-Air Phoenix Public Market I lapsed into what I can only describe as panic mode. Everything looked so good and … disjointed. Nuts in one corner, medicinal herbs in the other and somewhere in between a huge quantity of fresh produce all begging to be cooked.
Indecision was the theme of the hour, er… half hour, and after wildly swinging from idea to idea – “chevre chaud salad,” “no… roasted squash soup,” “no, something with beets!” – I finally settled on the “something with beets” choice and then racked my brain to dream up a meal involving these gorgeous vegetables. What did I decide on? Something with a little bit of everything – a Cowboy Ciao inspired chopped salad. I justified my sporadic decision with the thought, “I should celebrate the last little bit of summer before fall sets in…” and promptly purchased four beautiful tomatoes.
Everything was going according to plan until I realized that there were no dried fruits in the market, no fish and no local grain. So I improvised. After 2 panic laced phone calls to mom and $17.79 I had almost all of my ingredients, sans eggs and basil, and was on my way.
 I ended up with a beautiful head of lettuce, four heirloom tomatoes, three beets, one onion, one head of garlic, local goat cheese with cranberries and pecans, a box of organic – from California – brown rice couscous and three eggs from my neighbor. Not pictured, the basil, Queen Creek extra virgin olive oil, lemon and the Trader Joe’s buttermilk which I’m pretty sure comes from an Arizona facility, although I can’t prove it.
 Those beautiful eggs you see are from the neighbor’s chickens. The three hens lay different colors of eggs – brown, speckled brown and blue. The neighbors are very generous and right before I started cooking dropped by with a carton, which their son had creatively decorated to reflect their local nature. The carton reads, “Super Natural Eggs from Chickens! Uncaged, free range and angry!” Now, I’ve met these chickens and they never seemed angry to me, but clearly I was mistaken. The eggs are absolutely beautiful and I just love cooking with them. The only challenge is that the shells are much tougher than supermarket eggs, so if
 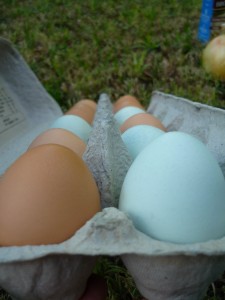 you’re trying to separate the yolk from the whites, it can be a little difficult to get a nice even break.
And now, onto the recipe. Anything in this recipe can be switched out according to taste or availability. It’s a very adaptable recipe, the key is to have a blend of flavors, textures and colors.
.
.
.
.
.
.
.
.
.
Chopped Salad with Basil Aioli Dressing
Inspired by Cowboy Ciao’s Stetson Chopped Salad

Serves 4
Ingredients:
1 cup basil aioli dressing (instructions below)
2 boiled beets, diced
2 ears roasted corn, removed from cob
2 cups cooked couscous
3 tomatoes, diced
4 -5 leaves lettuce, diced
4 ounces goat cheese
cooking spray
salt and pepper to taste
For the dressing (modified from America’s Test Kitchen Aioli dressing):
1 teaspoon minced garlic
2 eggs yolks
4 teaspoons fresh lemon juice
1/8 teaspoon sugar
4-5 leaves fresh basil
1/2 cup olive oil
3-4 tablespoons buttermilk
salt and pepper to taste
Using a food processor, combine the garlic, egg yolks, lemon juice, sugar and basil and process for 10 seconds until combined. Then, with the food processor on, slowly drizzle in the oil until combined, be careful not to over beat, no more than 30 seconds. Scrape down the sides of the bowl and blend for 10 more seconds. Add in the buttermilk and blend until just mixed. Add salt and pepper to taste.
For the salad:
Boil the beets until they can be pierced by a fork, about 45 minutes to an hour. Do not cut the tops off the beets before you boil them! While the beets are cooking, peel the husks back from the corn, remove the silk, rewrap, and soak for at least 30 minutes. Once the corn is soaking, cook the couscous by following the instructions on the box, this can take anywhere from 13 to 20 minutes. Chop the tomatoes and lettuce and set aside. While everything is simmering, soaking and boiling away, make the dressing.
When the couscous has finished cooking, season it with salt and pepper and set aside. After the corn has soaked, peel the husk back and generously coat the ears with cooking spray, salt and pepper. Grill until the corn turns golden-yellow in color and the kernels look blistered. While the corn is on the grill, start arranging the ingredients for the salad.

By this time, the beets should (hopefully) be done cooking, remove the skins and dice. Once the corn is grilled to perfection, slice the kernels off the cob. Finish arranging the ingredients, season with a little salt and pepper and drizzle the dressing on top.
Bon appetit!
Filed under: challenge, farmers markets, local, welcome | Tags: challenge, farmers markets, local, Phoenix
“You’ve got to be kidding, right? I mean, does anything actually grow there?”
When I tell people that I’m going to be eating at least one all locally grown meal per week, on a grad student’s budget no less, I get a lot of different reactions, but mostly disbelief.
“How can anything grow in 115 degrees?”
“Are you going to eat only Mexican food?”
“Well, I hope you like citrus!”
The truth is, produce grows very well in Arizona. Tomatoes are planted in February and yield through July, we have peaches into the second week of June and the winter brings us enough lettuce to make a salad for the nation. And, yes, we do grow a lot of citrus. The seasons may be a little different in Arizona, but our mild winters and the range of temperatures means that Phoenix is home to a wide variety of produce. Not that all of it is edible of course, unless you like the taste and texture of cattle corn.
But don’t get confused, I’m not planning on growing anything myself (my 700 square foot studio apartment and plant destroying cat are enough of a deterrent to limit me to one very pathetic basil plant), instead I’ll be relying on the farmers markets scattered through the Valley of the Sun and a small bit on my parent’s pepper garden and their neighbor’s laying hens. With the increasing consumer demand for local produce it’s become easy to eat local and support those who are growing and raising food responsibly throughout the Valley. There are farmers markets in every part of the Valley – don’t believe me? – check it out here. And yes, they are affordable and no, you don’t have to be a hippy to shop at them.
In the coming weeks I’ll be documenting my culinary exploits, trips to the farmers markets and urban farms and thoughts on the importance of eating local and forming a food relationship with my city. I welcome comments, tips and suggestions and I hope you join me as I discover the seasons of local food in Phoenix.
