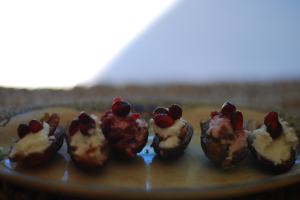
Filed under: asides, dinner, recipe | Tags: adventure, France, home, local, orléans, Phoenix, potatoes, recipe, season, Travel
 I lived in a city where the flowers magically changed every two weeks. There were palm trees and willow trees, pansies and roses. For months, I marveled at the power of the seasons, then I discovered the midnight workers who brought the plants in and out by the truck load. Brightly colored flowers in fall, low-lying ground cover in winter, whispy trees in spring. Even after the magic was gone, the city surprised me.
There was a green equestrian monument in the town square, a cathedral with mass only in the summer, weekly strikes.
It was in this city that I learned about cold, about determination, about friendship and about love. I learned how to stand on my own two feet, how to fight for myself, how to be poor but happy.
It was by the river that I discovered that no matter how far from home you go, it stays with you. When you leave, it never leaves you.
 I only lived in Orléans, France for eight months. It seemed like a lifetime and a dream all at once. Every day was a challenge, nothing was easy. Days were weeks, weeks were months, months were years. I fought losing battles, celebrated victories, and kissed windows in moments of joy.
And I grew up.
Two years ago today I set foot in a classroom as a teacher for the first time. I was unprepared. My lesson consisted of answering questions and talking too fast. I wrote in my blog that I wasn’t nervous. I lied.
Two years ago today I came home hungry and cold. Even though I lived next to a supermarché, I had been eating sandwiches, backpacking food, spaghetti with butter – anything cheap. I was happy beyond belief but I was also terrified.
I called home.
 I’m pretty sure I cried. And from my mom, who was worried, I inherited the recipe for scalloped potatoes. It was a turning point.
I cooked myself a real dinner for the first time in two weeks. I ate the whole pan of bubbling potatoes. And finally, I felt strong. This experience – all the ups and downs – wasn’t just happening to me, I was living it.
And I was happy.
Scalloped Potatoes
 This is an easy dish to make local no matter where you are. The trick here is to make a roux first. This isn’t a particularly French preparation but, for me, this is France.
Ingredients
1 batch roux (2 tbsp butter and flour, add milk slowly until the sauce is thick yet smooth)
6 potatoes
3 big handfuls emmental cheese, or any mild white cheese
2 slices ham, diced
1 small onion, diced
Preheat the oven to 375. Begin my making the roux. Melt the butter, once bubbling add the flour and whisk for 1 minute. Slowly add in the milk, one splash at a time – whisking continuously. The sauce will thicken into a paste. Keeping slowly adding the milk until it begins to resemble a thick cream sauce. Add salt and pepper to taste.
Microwave the peeled potatoes for 5 minutes on high. While the potatoes cook, dice the onion and ham.
Once the potatoes are cool to touch, slice them thinly. It’s important to keep the slices even in thickness.
In a casserole dish, spread a little sauce in the bottom, then layer the potato slices in the pan – don’t overlap them. Add enough cheese to loosely cover the potatoes, then sprinkle on a third of the ham and onions. Keep building layers with roux, cheese, ham and onions until you run out of potatoes. For the top layer, pour on the remaining roux and sprinkle generously with cheese.
Bake, uncovered, for 45 minutes or until a knife can be inserted with little resistance.
Filed under: dinner, recipe | Tags: celebration, change, fall, local, new, orange, Phoenix, pumpkin, recipe, seasons, stuffed, waiting
 Tonight it is cool outside. Things are changing: the sidewalks are no longer blistering to bare feet, the sun no longer holds the same intensity, pumpkins have appeared at grocery stores and I suddenly crave rich foods.
This is the beginning of a new season.
I have a tendency to measure the seasons by my orange tree. As the green orbs begin to gain color I know the cooler weather is coming. They aren’t quite there yet – but I’ve decided to pretend they are. I have to. I’m out of summer recipe ideas.
Fall is a decidedly melancholy season. A season of settling down, of putting the land to rest (but not in Phoenix), an expectation of cooler weather. But more than anything, it’s a season of waiting. Waiting for the cold, waiting for the winter, waiting for the holidays and, this year, waiting for graduation.
This is a fall I’ve looked forward to. This is a fall for celebrating.
So, to start it off, I’m bringing back my stuffed pumpkin recipe – a favorite from last fall and one perfect for celebrations.
Stuffed Pumpkin

This year, I’m not making the same mistake and will be stocking up on any and all local orange beauties so I can enjoy this dish more than once.
Adapted from Dorie Greenspan’s Around my French Table
Serves 6 (this will vary based on pumpkin size, the following is for a 6 pound pumpkin)
Ingredients:
1 pumpkin, about 6 pounds
1/2 pound nine grain bread, sliced thinly and cut into 1/2 inch pieces
1/4 pound cheddar cheese, cut into 1/2 inch cubes
1/4 pound Monterey Jack cheese, cut into 1/2 inch cubes
2 cloves garlic, coarsely chopped
6 small slices ham, cooked and chopped into 1/4 inch pieces
2 Tbsp fresh chives, chopped
2 Tbsp mild onions or scallions, chopped
1 Tbsp thyme
2/3 cup heavy cream
pinch of freshly ground nutmeg
salt and pepper to taste
Preheat oven to 350 degrees. Line a baking sheet with parchment paper or you can use a dutch oven or casserole dish. The pumpkin will retain its shape regardless of what you cook in it, however if you plan to serve it in slices it’s best to use the baking sheet.
Cut a cap out of the top of the pumpkin and clean out the guts. Generously pepper the inside of the pumpkin and set in on the baking sheet or dish.
Toss the bread, cheese, ham, garlic and herbs together in a large bowl. Add the nutmeg and some salt and pepper to the cream (go easy on the salt, however, as the cheese and ham are quite salty). Pour the cream mixture over the combined ingredients and toss well. You want the bread to be moist, but not swimming in cream.
Using your hands – or a spoon – stuff the ingredients into the pumpkin. You may have too much or too little – every pumpkin is different – adjust as necessary. Place the cap on back on the pumpkin and bake for 2 hours. Check the pumpkin after 1 1/2 hours. For the last twenty minutes of cooking time remove the cap so the ingredients can brown and any residual liquid bakes off. The pumpkin is done when the ingredients are bubbling and the flesh of the pumpkin can be easily pierced with a knife.
You can serve this in slices or, if you prefer, scrape the pumpkin meat away from the sides and mix in with the stuffing.
Filed under: challenge, dinner, garden, recipe | Tags: dirt, garden, garlic, local, parsley, pasta, Phoenix, recipe, roots, weeds
 Sunday five-thirty p.m., I am freshly showered, no shoes, in the garden. This is supposed to be a quick stop – I don’t want to deal with the weeds or the now-weed-like-plants taking over. I just want parsley.
I know where the parsley should be; remember where I planted it in the spring. I know it, tall and leafy, leaning over all the shorter herbs clustered together in the small dirt space. I know it, and yet I can’t see it.
What I can see are the reaching runners of spreading grasses, the pink blooming plants that make you hesitate for a second between the weed/not-a-weed line, the thorny squat leaf clumps that leave the hands stinging.
There is parsley in there. There has to be.
So I move aside some blooming grasses, curious if I can skirt by for another week just pushing aside the gargantuan plants that I’m pretty confident I didn’t plant in the first place.
 And there, under a particularly large clump of grass, I find the herb – half dead, a quarter of its original height. Wilted, choked by the out-of-control vine that’s overtaken most of the garden. It is a sorry sight.
Something snaps. Out by the roots go the grasses and the thorny clumps. The vines are ripped out, a dozen strands at a time. The towering pink-flowered plants resist before eventually releasing from the soft ground, leaving a webbed network of roots behind.
Twenty-minutes later, I can see where plants begin and end. The dead cucumber remains tied to the stake, but the sweet potatoes are mostly free of the competing grasses and vines. The herb patch is once again visible and the oregano is thriving. The tomatoes are on their last legs, but the bell pepper has two new fruits clinging to a ridiculously crooked plant.
Finally, after months of neglect, there it is – my garden – worse for the wear but still surviving. And here I am, arms cut up, hands stinging, feet dirty. My just washed hair is stuck to my face, which is now smeared with dirt.
Dirty or not, this feels like a victory.
Victory Parsley and Garlic Pasta
This is a simple pasta. It takes 20 minutes from start to finish and is perfect for the warm days and cooler nights. This is an endlessly adaptable dish. The basics are, 2 cloves of garlic per person and a small handful of any fresh herb.
This is for the parsley that somehow survived.
Ingredients:
8 cloves garlic, finely sliced
1/4 cup parsley leaves, coarsely chopped
1/4 cup olive oil
1 pkg spaghetti or linguine
salt and pepper to taste
a sprinkle freshly grated parmesan
Bring a large pot of water to boil. While the water cooks, slice the garlic cloves and chop the parsley.
Once boiling, salt the water and cook the pasta according to the directions on the package.
With three minutes left on the pasta cooking time, heat the olive oil in a large skillet. Once hot, add in the garlic and cook until fragrant, about 30 seconds to 1 minute. Once you can smell the garlic, toss in the parsley and cook about 45 seconds, or until the parsley just begins to wilt.
Immediately add the pasta straight into the garlic, herb and olive oil mixture. Season with salt and pepper to taste. Toss until the pasta is coated. If the mixture seems too dry, add in some of the cooking water.
Filed under: dinner, garden, recipe | Tags: august, basil, Bobby Flay, goat cheese, grill, heat, local, Phoenix, pizza, recipe, sausage, tomatoes
 There comes a point every summer where the heat just becomes too much. It comes every August. That moment where saying the word “hot” just doesn’t justify the pressure from the sun.
These are the weeks when cooking becomes impossible. Turning on the oven or a burner runs the dangerous risk of bringing the inside temperature nearer to that of the outside. Every year I contemplate if I can subsist on ice cream alone.
Despite my best efforts to eat only cold or frozen things, I slowly dissolve into a hungry baby bird – opening and closing the refrigerator, wondering if something lies inside that will keep my stomach from rumbling.
Something I can cook without bursting into flames.
Something to celebrate the season of ripe tomatoes, green basil.
Something easy that will keep the kitchen cold.
 And then, over the waves of roaring hunger came Bobby Flay with his grilled pizza. It was, and is, the perfect solution to the shimmering heat. Cook outside, over a fire, away from the house.
It turns out grilled pizza crust is the ideal vehicle for garden leftovers and stunning local Italian sausage. I added Crow’s Dairy goat cheese, a perennial favorite – but the star was The Meat Shop‘s Sweet Italian Sausage. Hell, you could even skip the pizza and just eat the sausage with a side of tomato salad – but I digress.
Grilled Pizza
This is a classic cracker crust pizza – add what you want, as long as it isn’t too wet, which will take the crust from crackery to mushy in a heartbeat.
Adapted from Bobby Flay
Serves 4 – 6
 Ingredients:
1 recipe pizza crust (make your own with a favorite recipe or use a pre-made crust)
1/4 cup flour
1/2 cup olive oil
3 Sweet Italian Sausages, grilled and sliced
4 oz goat cheese
4 oz mozzarella or monterey jack cheese, grated
4 medium tomatoes, chopped
4 sprigs fresh basil, chopped
Heat the grill to 400 F.
While the grill warms, roll out the pizza crust as thin as possible. Flour one side and brush the other side with olive oil.
Once the grill is hot, coat the grates with olive oil.
Flip the pizza, oil side down, onto the hot grill. Immediately brush the other side with the oil. Leave the lid open and let the crust cook for 7 minutes or until the crust has a nice golden hue. Flip the pizza crust and let cook for another 5-7 minutes.
When the crust is golden on both sides, place on a cookie sheet. Top with the cheese, sausage, tomatoes and basil. Place the pizza – on the cookie sheet – back on the grill. Close the lid and let cook until the cheese melts, about 3 minutes.
Filed under: dinner, recipe | Tags: carrots, childhood, green beans, last meal, nostalgia, roast chicken
Published April 4, 2011
 Several years ago, I was watching a cooking competition TV show where the contestants had been tasked to create a last meal for 5 or 6 famous chefs. In an instant, without hesitation or concern, I knew what my last meal would be, should I ever have to request it: roast chicken with sweet potatoes, carrots smothered in butter and green beans.
No matter how much I think about it, I can’t fully explain my choice.
There are so many meals that I love, so many tastes that remind me of adventures, home, favorite memories.  There’s my mom’s spaghetti, my French love, pain au chocolate, or my favorite childhood meal, green chile chicken enchiladas.
And yet, my choice is roast chicken. It is soothing, simple, rustic. I instantly think of bare feet, dirty from picking herbs in the garden, walking on my parent’s wood floors. The dirt is crunching, there’s a slight feeling of guilt for tracking mud, and everything smells like chicken.
 But my nostalgia is out of place. I’ve lived in a city my whole life and, until recently, chicken has always come wrapped in plastic sans innards from the grocery store. (it still comes wrapped in plastic, except now there are guts and farmers)
As it turns out, the nostalgia comes from a previous generation. My mom grew up with chickens – bred specifically for dinner. Upon sighting a 9-pound bird at the Meat Shop, just like the ones they raised, her eyes lit up and the afternoon was filled with excited stories of “our chickens growing up.”
I may have inherited my nostalgia for roast chicken, but the love is all my own.
Roast Chicken
Adapted from Julia Child’s Mastering the Art of French Cooking
If you don’t have a 9-pound chicken, use the following times for cooking: 3-pounds, 1 hour and 10 to 20 minutes; 4-pounds, 1 hour and 15 to 30 minutes; 4 1/2 pounds, 1 hour and 25 to 40 minutes; 5 1/4 pounds, 1 hour and 30 to 45 minutes; 9-pounds, 3 hours.
Ingredients
9-pound chicken
3/4 tsp salt (in 1/4 tsp increments)
5 Tbsp softened butter
1 lemon
1 large onion, quartered
1 carrot, cut into large pieces
A couple sprigs thyme
1 Tbsp cooking oil
1/2 Tbsp shallot or onion
1 cup chicken stock
2 Tbsp softened butter
salt and pepper
Preheat the oven to 425 degrees.
Clean the chicken and pat the outside dry with paper towels. In a 12 inch skillet, melt 1 Tbsp butter. Once hot, begin to brown the chicken, turning the bird once every 3-5 minutes until all sides have a nice, light brown coloring.
Sprinkle the inside of the bird with salt, smear in 1 Tbsp butter and add the onion quarters, carrot pieces, thyme sprigs and lemon into the cavity. Truss the chicken. Rub the skin with the 1 Tbsp butter.
Place the chicken breast up in the roasting pan (it’s easiest to set in a V-shaped roasting rack inside the pan). In a small sauce pan, combine 2 Tbsp butter and 1 Tbsp oil, cook until just melted.
Allow the chicken to continue browning for 15 minutes, turning it every 5 minutes and basting after each turn, finish with the chicken resting on one side. Reduce oven to 350 degrees. Leave the chicken on its side and baste every 10 minutes, using any fat collected in the roasting pan if you run out of the butter and oil mixture.
Halfway through the cooking time, salt the chicken with 1/4 tsp salt and turn on its other side.
Fifteen minutes before the end of the estimated cooking time, salt with 1/4 tsp salt and turn the chicken breast up.
Using a thermometer, check for doneness. The breast should read 170 degrees and the thigh should be at 180. Let the chicken rest for 10 – 15 minutes under tented foil before carving.
For the sauce, use the roasting pan. Remove all but 2 tbsp chicken fat. Add in the shallots or onion and cook slowly. Add in the chicken stock and boil rapidly, scraping up any fond. Season with salt and pepper and, if desired, add in 1 tbsp butter.
Serve with roast carrots, green beans and sweet potatoes or potatoes.
Filed under: challenge, dinner, recipe | Tags: chicken, greek, lemons, local, olive, Phoenix, recipe, tomato
Published February 13, 2011
 There are some meals where all you do is introduce the raw ingredients to fire, using the cooking process to draw out the natural flavor, complementing them ever-so-slightly with salt and pepper. A meal where the whole is better than the parts, but each component stands alone. This is one of those meals. And it’s really simple.
I’m often hesitant to cook with local chicken – not for reasons of cost or availability – but instead worried that whatever I create won’t stand up to a chicken that actually tastes like, well, chicken. Somehow cooking with a chicken that has a depth of flavor leaves me baffled. How do you draw it out, show it off, accentuate it? I want to do this chicken justice. And until this meal, I’ve resorted to roast chicken, confident that the tried and true method is the best display for real chicken.
 I now realize the error of my ways.
It turns out that these birds are strong enough in flavor profile to outshine even the most acidic of complements. In fact, the bird becomes an even bigger star. While the lemons from a friend’s tree, olives from Queen Creek Olive Mill (which are unbelievable) and locally made feta give the chicken a run for her money – she stands alone in her excellence.
And for a meal that could easily be made on weeknight, well, the bird steals the show.
Butterflied Greek Chicken
Adapted, ever so slightly, from Bobby Flay
Serves 4
Ingredients:
 1 3-pound chicken, butterflied (step by step instructions here)
Salt and pepper
Canola Oil
6 plum tomatoes, halved
3 lemons, halved
1 red onion, skin on, cut into 1/2-inch thick rounds
1/4 red wine vinegar
2 Tbsp Dijon mustard
1/2 to 3/4 cup olive oil
2 – 3 Tbsp chopped oregano leaves
1/2 olives, pitted
6 ounces feta, crumbled
1/4 cup basil leaves, chiffonade
1/4 cup greek yogurt (or, since unable to find locally, sour cream with a squeeze of lemon juice)
Preheat grill to medium, leave 1 side or section of the grill off. Season chicken on both sides with salt and pepper and coat well with canola oil. Place the chicken, skin side down, on the grill over direct heat. Cook until golden brown and slightly charred. Once the skin is charred and blistered, flip over and move to the indirect heat. Continue cooking until an instant-read thermometer inserted into the chicken reads 170 F for the thigh meat – about 14 – 17 minutes. Remove from grill and let rest for 10 minutes before cutting.
While the chicken is on the grill, brush the tomatoes, lemon and onion with oil and season with salt and pepper. Grill lemons, cut side down, until golden brown – about 8 to 9 minutes. Grill the tomatoes, cut side down, and onion for 5 – 7 minutes until softened and slightly charred.
Meanwhile, make the vinaigrette by combining the vinegar, mustard and olive oil in well sealed jar. Shake, rather violently, for 30 seconds until combined. Add in the oregano and season with salt and pepper.
To serve, carve the chicken into 8 pieces and arrange on a plate or shallow bowl with the tomatoes, onions and all but one of the lemon halves. Evenly scatter the olives and feta cheese and drizzle with vinaigrette. Add the basil leaves. If using sour cream, add a half squeeze of a half of the cooked lemon and mix well. Dollop the yogurt or sour cream mixture in the center of the platter. Squeeze the remainder of the lemon half over the platter.
Filed under: dinner, local, recipe | Tags: Champ, Green Onions, Ireland, Kerr's Pink, local, mashed potatoes, Northern Ireland, potato, recipe, Scallions
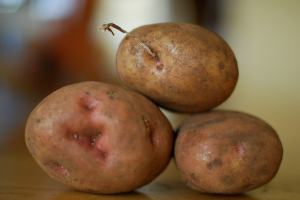 When thinking of Ireland, a few things always come to mind: pints of Guinness, sheep, fields of green and, inevitably, potatoes. But visiting Ireland for me isn’t so much of a tourist thing – I do, typically, manage a few famous sites – but instead, it’s all about enjoying the daily rhythms of life in beautiful N. Ireland. There’s the multiple mugs of black tea, servings of toast and, without fail, a wonderful dinner complete with potatoes.
Potatoes are an integral component of the diet here, and they are served with almost every meal. From chips (that’s French Fries for us Americans) at lunch to heaping helpings of mashed potatoes at dinner, I can count on one hand the number of non-breakfast meals that I’ve eaten during the last three weeks without potatoes (and I cooked two of them). Breakfast typically consists of toast and cereal but, when given the chance, out comes potato bread and various other potato filled dishes.
 It should come as little surprise, then, that there are – according to Darina Allen in her wonderful cookbook Irish Traditional Cooking – seven “favourite varieties of potato” to be found on the emerald isle. These include Home Guard, British Queens, Golden Wonders, Aran Banners, Records, Champions and, the current seasonal choice, Kerr’s Pink. Unlike the Yukon Gold’s of America, Kerr’s Pink come with a gentle crust of dirt and an earthy smell. Their texture is less wax and more dry, with a cream-colored flesh and somewhat mealy interior which fluffs up nicely with a bit of mashing.
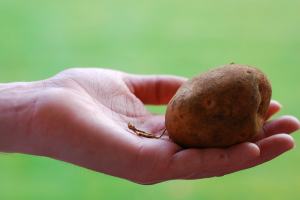 Of the myriad ways of cooking them – from basic mash to fried – my favorite Irish potato dish remains Champ. A mash of hot potatoes, boiling milk, green onions and a blob of melting butter, its simplicity is the secret. Darina Allen tells us that Ulster (the northern part of Ireland) is a “particularly rich source of recipes” for Champ and I have to agree. Whether with added peas or chives, Champ seems to make a weekly appearance … and I’m glad it does.
Champ
recipe from Caroline Collins
Serves 4
15 potatoes, preferably “old potatoes”
4-5 sprigs scallions (green onions), finely chopped
1 cup milk (cream can be substituted for special occasions)
1 oz butter, plus more for mashing
salt and white pepper to taste
Peel the potatoes and boil until cooked through. While the potatoes cook, in a small sauce pan, add the scallions and cover with cold milk and 1 oz butter. Bring the mixture slowly to a boil, simmer for 3 – 4 minutes then remove from heat and leave to infuse.
Once the potatoes have finished cooking, mash the hot potatoes with the milk mixture and small pieces of butter to taste. Season with salt and white pepper (which mixes better with the potatoes than black pepper) and serve with a slice of butter melting in the center.
Bon Appetit
Filed under: challenge, dinner, holiday, local, phoenix | Tags: apple, Arizona, carrots, challenge, cheese, chicken, dates, farmer cheese, farmers markets, local, Phoenix, potato, recipe, sausage, stuffing, sweet potato, thanksgiving
A quick little note: I don’t believe in the “I’ve been super busy” excuse because everyone is busy … but things have been crazy around here lately. So, in an effort to get this post out (finally) there are no recipes with it. Don’t worry, they’re coming, just not right now. Once finals are done, I promise.
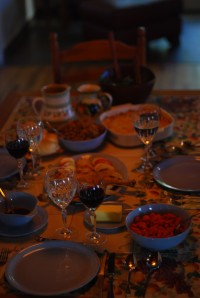 Yes, Thanksgiving was two weeks ago. Yes, ideally, I should have posted this before Thanksgiving. All that being said, however, this Thanksgiving was amazing. It was the first time I’ve really jumped in and cooked – and it was a blast. We had a pretty non-traditional meal, but, then again, we wouldn’t do it any other way.
In trying to adapt this traditional meal to one made with all local products, I was surprised by how few sacrifices needed to be made. In fact, the only things cut from our traditional meal were the cranberry sauce (which doesn’t go with chicken anyway) and cherry pie (which we still had – it just wouldn’t be a holiday without a cherry pie).
We also didn’t have pumpkin pie -which we could have made from scratch – opting for sweet potato instead. For those of you out there who absolutely love pumpkin, let me tell you, the sweet potato version was actually – gasp – better. Now, before I get any hate mail, let me do some explaining. This pie was both sweet and savory and had a wonderfully rich sweet potato flavor. Unlike pumpkin pie where one flavor is dominant, this recipe had a lot of depth and each bite was its own, unique flavor. By the next day the flavors were so complex that each bite required a little bit of time to explore. It will most likely become our Thanksgiving staple from now on.
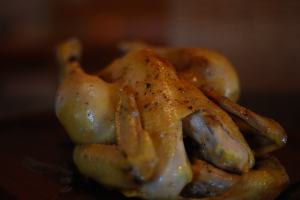 This year, we cooked a chicken – which is something we’ve been doing for several years now – and it was our first sample of local, pasture raised chicken. I’m not sure if there’s a better way to describe it, but it tasted like, well, chicken. The meat had an actual flavor, which isn’t something you always get with the bland, dry grocery story variety. We had our perennial favorites – stuffing and salad. And instead of sweet potato casserole this year (made without marshmellows, thank you very much) we had scalloped potatoes.
Shopping for all these ingredients wasn’t nearly as challenging as I’d expected. I’d started the week before with the local chicken, bread (the nine-grain bread from the stuffed pumpkin was so delicious that I had to repeat it), potatoes, onion and cheese. The day before the big dinner, I stopped by the Wednesday market in Phoenix to pick up everything else I needed.
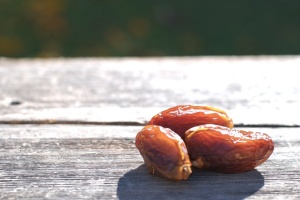 While purchasing the sweet potatoes from Horny Toad Farms I was very eagerly talked into some local medjool dates. The little guy selling them was really worried I’d balk at the price and did everything possible to prepare me for the “big cost.” By the time he was ready to tell me the price, I was concerned that I’d fallen in love with $25 dates. Turns out it was $7.50 for a carton – which, in my book, is a steal. In the end, I was so happy I bought them because they were perfect stuffed with Udder Delights cranberry farmers cheese and topped with pomegranate seeds.
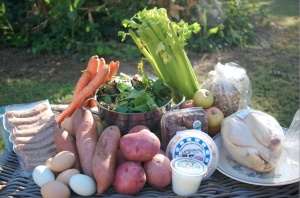 I picked up the rest of my required produce and headed over to the Tempe Farmers market to get butter, some more cheese (because you can never have enough) and breakfast sausage for the stuffing. All told, it took three trips to get everything – which really – isn’t any more than normal.
With the paired down menu and lack of a turkey, the cooking requirement was manageable. My Mom cooked the pies in the morning, Dad started the chicken around 1:30 in the afternoon and with an hour of cooking time left I started assembling the stuffing – made with breakfast sausage from the Meat Shop – and scalloped potatoes. Yes, we all helped, but this was a Thanksgiving dinner that one person could have reasonably cooked in one day.
The best part of the day was experiencing some the traditional flavors in season, fresh and locally grown. We had bread made by neighbors (they go around the neighborhood once a week selling fresh, homemade bread), eggs raised by friends and a bird that lived a normal life before being sacrificed for a special meal.
I’m not one to get overly sentimental … oh, who am I kidding, I cry at cheesy movies … but this meal was really special. While the food may have tasted better thanks to its freshness, knowing it came from people who care about our and the land’s health made the meal all the better. Sharing it with my wonderful parents and working together to get it on the table made it a truly wonderful holiday. I look forward to more local Thanksgivings for years to come.
Happy Holidays and Bon Appetit!
Quick Note: Here’s the photos that will go with the recipes, you know, so you come back and read them …
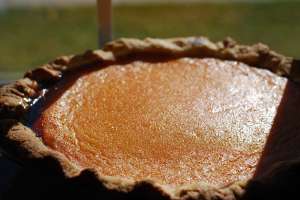
Sweet Potato Pie
From America’s Test Kitchen
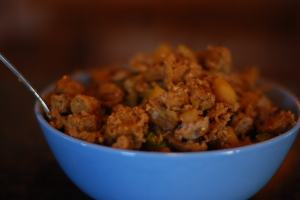
Apple Sausage Stuffing
From America’s Test Kitchen
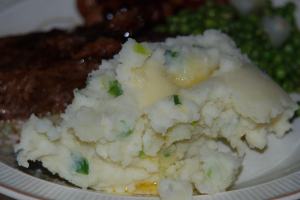
Scalloped Potatoes
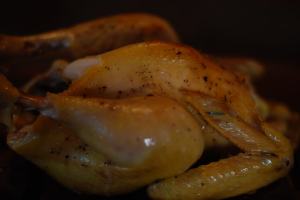
Roast Chicken
From America’s Test Kitchen
Stuffed Dates
Boiled Carrots
Filed under: challenge, dinner, farmers markets, local, phoenix, recipe | Tags: apple, apples, Arizona, cake, challenge, cheese, farmers markets, local, Phoenix, pumpkin, recipe, rooster, stuffing, swiss chard, thanksgiving, whipped cream
 With Thanksgiving right around the corner – or tomorrow, to be exact – I decided to cook some trial recipes and see how they turned out. I’m a big fan of cooking new recipes (and do so almost every week) but there’s nothing worse than making a brand new recipe on Thanksgiving day only to have it turn out rotten. I stumbled across an amazing recipe from Dorie Greenspan for stuffed pumpkin while searching Amazon for new cookbooks a few weeks ago and feverishly searched the market for pumpkins the following week. Much to my dismay, I came up empty-handed both weeks and, figuring that I had missed the last of the pumpkins for the season, resigned myself to waiting until next year.
You can imagine my joy when I saw a cluster of bright orange beauties at one of my favorite stands, Horny Toad Farm, just waiting to be turned into dinner. I picked up the roundest one I could find, at a hefty 6 pounds, and merrily changed my plans for the week from swiss chard enchiladas to stuffed pumpkin. In retrospect, I should have purchased two of them – seeing as pumpkin always comes in handy at Thanksgiving – but my arms were already overloaded with two whole chickens, a large bag of apples and various other produce. Fortunately, there’s a market on today, although I’m not sure if there’ll be any orange balls of joy waiting for me.
 Following my pumpkin acquisition, I quickly picked up the remainder of ingredients required for dinner, somehow got talked into buying 1 pound of jalapenoes for $2 (I have, literally, no idea what to do with them – they might get pickled), and headed off to pick up some wine for dinner and Thanksgiving. On the way, I stopped at the Tempe Farmers Market – they have a better cheese selection – I stumbled across their free expired bread and picked up a loaf for Wily. By the time I made it home from my epic shopping trip – three and half hours later – I had ten different bags of goodies. I’m still not entirely sure how I ended up with all that stuff, however I’m pretty prepared for Thanksgiving (kinda).
It turns out that stuffed pumpkin is a phenomenally easy dish to make. I’m very disappointed that it won’t be gracing my Thanksgiving table, however with only one oven a chicken or two to cook there’s no way I can fit a pumpkin in as well. However, it’s a fantastic substitute for a whole bird and could easily be adapted for a gorgeous vegetarian main course. If takes about fifteen minutes to cobble the stuffing ingredients together and, depending on your pumpkin cleaning skills, about 10 minutes to get the inside clean. After that it’s smooth sailing – it simply sits in the oven for two hours – no further cooking required.
The ease of the pumpkin meant that I had time to put another Dorie Greenspan recipe together – apple cake. As someone who doesn’t like overly sweet dessert, I seek out French style desserts which highlight the fruit and not the sugar. The only challenge here is the fact that the required rum and sugar cannot be sourced locally, however, I’m not willing to completely sacrifice the delicate flavor of this cake for, oh, one cup of ingredients. I’m delighted to report that this apple cake is simple to put together and, with a dollop of whipped cream (not from a container) it’s a wonderfully light dessert. And one that I will happily make again and again.
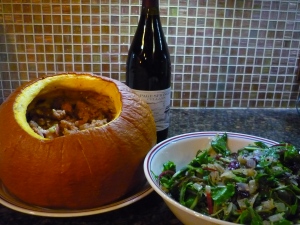 Finally, while the cake was sharing the oven with the pumpkin, I started in on the swiss chard dish. The recipe comes from my newest cookbook acquisition, Simply in Season, and – with the exception of cranberries – is easily assembled from the ingredients I picked up at the market in the morning. I’m not the biggest fan of swiss chard, however, it’s in season right now which means it’s time for me to learn to love it. Initially, I was hesitant about the recipe, but after a few bites I was sold. The cranberries (which are not from Arizona, but were organic) and sugar highlight the complexity of the chard and make it my current – and only – favorite chard dish.
.
Stuffed Pumpkin
Adapted from Dorie Greenspan’s Around my French Table
Serves 6 (this will vary based on pumpkin size, the following is for a 6 pound pumpkin)
Ingredients:
1/2 pound nine grain bread, sliced thinly and cut into 1/2 inch pieces
1/4 pound cheddar cheese, cut into 1/2 inch cubes
1/4 pound Monterey Jack cheese, cut into 1/2 inch cubes
2 cloves garlic, coarsely chopped
6 small slices ham, cooked and chopped into 1/4 inch pieces
2 Tbsp fresh chives, chopped
2 Tbsp mild onions or scallions, chopped
1 Tbsp thyme
2/3 cup heavy cream
pinch of freshly ground nutmeg
salt and pepper to taste
Preheat oven to 350 degrees. Line a baking sheet with parchment paper or you can use a dutch oven or casserole dish. The pumpkin will retain its shape regardless of what you cook in it, however if you plan to serve it in slices it’s best to use the baking sheet.
Cut a cap out of the top of the pumpkin and clean out the guts. Generously pepper the inside of the pumpkin and set in on the baking sheet or dish.
Toss the bread, cheese, ham, garlic and herbs together in a large bowl. Add the nutmeg and some salt and pepper to the cream (go easy on the salt, however, as the cheese and ham are quite salty). Pour the cream mixture over the combined ingredients and toss well. You want the bread to be moist, but not swimming in cream.
Using your hands – or a spoon – stuff the ingredients into the pumpkin. You may have too much or too little – every pumpkin is different – adjust as necessary. Place the cap on back on the pumpkin and bake for 2 hours. Check the pumpkin after 1 1/1 hours. For the last twenty minutes of cooking time remove the cap so the ingredients can brown and any residual liquid bakes off. The pumpkin is done when the ingredients are bubbling and the flesh of the pumpkin can be easily pierced with a knife.
You can serve this in slices or, if you prefer, scrape the pumpkin meat away from the sides and mix in with the stuffing.
Sweet and Sour Swiss Chard
Adapted from Simply in Season
Serves 4
Ingredients:
1 pound swiss chard
1 medium onion, diced
1/4 cup dried cranberries, raisins or currants
2 cloves garlic, minced
2 tsp olive oil
3 Tbsp vinegar
1 1/2 tsp sugar
salt and pepper to taste
Stack the chard leaves, roll them up and slice into 1 inch strips.
In a large skillet heat up the olive oil and saute onions until softened, about 5 minutes. Add in 1/4 of the chard leaves along with the garlic, vinegar, sugar, cranberries and salt and pepper. Cover and simmer for 5 – 8 minutes. Place the remainder of the chopped leaves on top – do not stir in – cover and cook for 2 – 3 more minutes. Stir the mixture around and let cook for another minute.
Apple Cake
Adapted from Dorie Greenspan’s Around my French Table
Serves 4
Ingredients:
¾ tsp baking powder
Pinch of salt
6 small to medium apples
2 large eggs
¾ cup sugar
3 Tbsp dark rum
½ tsp bourbon vanilla extract
8 Tbsp (1 stick) unsalted butter, melted and cooled
Preheat oven to 350 degrees. Generously butter an 8 inch cake pan – preferably a spring form or false bottom pan.
Peel the apples and slice into 1 – 2 inch pieces.
Whisk the flour, baking powder and salt together in a small bowl.
In a medium bowl, beat the eggs with a whisk until foamy. Add in the sugar and blend thoroughly. Add in the rum and vanilla extract. Whisk in half the flour mixture and once smooth add in half the butter and whisk until smooth. Add in the remaining flour mixture, whisk and the remaining butter whisking until the batter is smooth and thick. Using a rubber spatula, fold in the apple pieces until they are coated in batter. Scrap the mixture into the pan and level it as much as possible.
Bake for 50-60 minutes until the top is golden brown and a toothpick inserted into the center comes out clean. Transfer to a cooling rack and let rest for 5 minutes.
Gently run a butter knife around the edge of the cake, remove the sides of the cake pan and let cool until it is at room temperature. If you want to remove the cake from the cake bottom, use a a long spatula or long knife and work it gently until the cake is loosened from the pan. Place a large plate on top of the cake and gently flip the cake and pan bottom over, gently release the cake bottom from the cake. Using a second plate, flip the cake back over so the golden brown side is facing up. Serve with a dollop of whipped cream (the recipe follows, by popular request)
Almond flavored Whipped Cream
Makes enough for one cake
Ingredients:
1 cup heavy cream
1 1/2 Tbsp sugar
1 capful amaretto liquor
Combine all ingredients in a medium bowl. Beat with a hand mixer until soft, fluffy peaks form. Adjust the sugar to taste. If you don’t want to use the liquor, you can substitute a couple drops of almond extract.
Bon Appetit!
Filed under: challenge, dinner, farmers markets, local, phoenix, recipe | Tags: Arizona, challenge, cheese, chickens, eggs, farmers markets, France, gratin, julia child, local, olive oil, onion, Phoenix, pork shoulder, radish, recipe, rooster, salad, sparkling wine
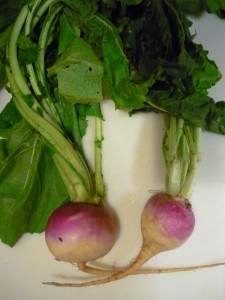 Last week, I crossed pomegranate tree off my garden wish list. This week, I made some significant progress on the chicken front. While I still don’t have actual chickens, I do have a rooster! Well, I should say that my parents have a rooster since he lives in their backyard and not my studio apartment. How we ended up with him is a long story but, suffice it to say, we decided to keep the young vagabond and let him roam free in the yard. Sadly, after much deliberation, we decided against getting hens to go with Wily (it’s a very descriptive name, let me tell you). So for now I have to be content with the little guy who – despite his best, and hilarious, efforts – is still too young to crow.
In honor of Wily, and thanks to my neighbor’s generous gift of a dozen eggs, this week I decided to celebrate chickens … by cooking eggs (and not chicken). After some debate about what type of egg dish to create, I ended up choosing gratin. I had initially hoped to create a leek and pork shoulder version – with the leeks individually wrapped in a slice of pork shoulder – however the leeks I found at the market this week left something to be desired. The potato version is just as good and is a great dish to make at the end of winter when you only have small quantities of staples left on hand. Not that this is the end of winter – or even winter – mind you.
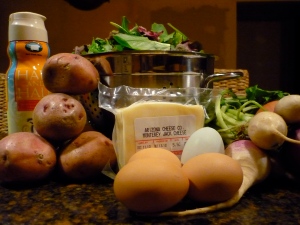 I made two trips to the market this week. The first trip was punctuated by attempting to interview farmers for a homework assignment (let’s just say it didn’t go well) and then rushing off without any purchases in hand. I once again tried to make it to the open air market at the Tempe market but just missed it. The good news, however, was that, except for leeks, the store had all the ingredients I needed.
Gratin is an amazingly easy dish to create, surprisingly adaptable and just as easy as making scrambled eggs. This is a perfect lunch or dinner dish and especially wonderful as the weather turns colder. This version, made straight out of Julia Child’s Mastering the Art of French Cooking, turned out more eggy than those I remember eating in France – but just as good. Served with a slightly bitter salad (but not too bitter, hence the caramelized radishes) and sparkling wine from New Mexico, it absolutely sings. My only caution is to make lots of it – three hungry people easily devoured a serving for four.
Gratin of Shredded Potatoes with Ham, Cheese and Onion
Adapted from Julia Child’s Mastering the Art of French Cooking
Serves 4
1/2 onion, minced
2 Tbsp olive oil
4 Tbsp butter
3 slices pork shoulder or ham
4 eggs
1/2 clove crushed garlic
2 Tbsp chives, minced
2/3 cup Monterey Jack cheese, grated
4 Tbsp half and half
1/4 tsp salt
Pepper
3 medium sized potatoes
1/2 Tbsp butter in pea sized pieces
Preheat oven to 375 degrees. In a large skillet, combine 2 Tbsp butter with the olive oil over medium heat. Once hot, cook the onions slowly until softened but not browned. Raise the heat slightly, stir in the pork shoulder, and cook until heated through. Set aside.
Beat the eggs, garlic, herbs, cheese, half and half and seasoning in a large mixing bowl. Add in the ham and onions.
Peel the potatoes and grate them using the large holes of the grater. Take 1/3 of the potatoes at a time and, using paper towels, squeeze out the water. Add the potatoes to the egg mixture. Adjust seasoning as necessary.
In the same skillet from earlier, melt 2 Tbsp butter until foaming. If your skillet isn’t oven proof, use an 11 – 12 inch baking dish or medium sized casserole dish and pour in the foaming butter. Pour the egg mixture into the dish. Dot with the pea-sized butter pieces and bake for 30 to 40 minutes until top is nicely browned.
While the gratin bakes, prepare the salad.
Caramelized Radish Salad
Serves 4
Ingredients:
1 head lettuce, preferable arugula or other bitter salad mix
3 medium radishes
1 tbsp butter
pinch sugar
1 portion Basic Vinaigrette Dressing (found on recipe page)
Slice the radishes into match sticks. In a small skillet, melt the butter over medium heat and once hot, add the radishes. Give them a good stir after about a minute and add in a pinch of sugar. Let set for another minute, and stir again. Keep them on the heat until they begin to blister with brown spots. When done, remove and add to the salad. Toss with dressing right before serving.
Bon Appetit!
